Monday, March 31, 2014

Back to School

Well, the week of spring break flew by! Today I was back to school being creative with the kiddos. If you'd ever like to see what kinds of things go on in my artroom, stop on over to Portrait of An Art Room. Anyway, when I got home from this first day back, I had to have a sewing break. 


The modified pineapple block that I posted about earlier had to be revisited. There was much discussion about the blocks on our bee Facebook page. It seems that the cutting directions made some of the steps a little tricky. In the end, the blocks I made were not the right size. So I went back to the drawing board. It was suggested that we cut squares at 3 1/2" (2), 4", 5", 6", 8". Needless to say, the sizes had to be adjusted slightly. Members of the group were having to trim down quite a bit after piecing to get the next square to fit. The final block is about 10 1/2". 
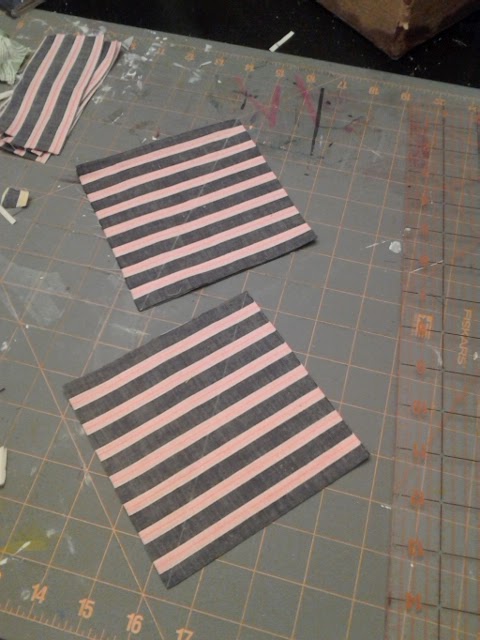
Pictorial Recap!
Pinch to cut!
Cut on pencil lines, press open.
Place next size square on top and sew around.
In addition to the grey modified pineapple block from the previous post, we were to make a block that showed a color gradient. This block would be made of seven fabrics instead of only 6. With that in mind, I followed the same steps for the grey block. We were supposed to cut and then cut an additional square of 9". If you remember though, the grey block ended up being 10 1/2", that would be an awful lot of trimming to get a 9" square to fit. So I cut a 10 1/2" square of the seventh fabric. 

Wait a second! (Here I imagine the sound of a record needle screeching across the vinyl to a stop.) I couldn't do that though. I had only purchased quarter yard cuts of each of my fabrics with a final 9" square needed. I had to do some creative problem solving.  


I ended up cutting two right triangles; one triangle for each half of the square. I knew, that had it been a square of the appropriate size, I would be cutting anyway, so why not just start with two pieces. This worked out well for me.

I am realizing that as an artist, and art teacher that I often am much more forgiving when things need a little finesse to get them to work out. I hope that if you try this technique you are understanding that there may be a little trimming here and there to get all of the squares to match up. Perhaps, as I've just read about, we need to stitch with a scant 1/4" seam. My seams are pretty true to 1/4", so that could cause some, hmm, a good word for here, frustration.

Here is my grey block, on top of the color gradation. I don't want to reveal the final block until our Leader Bee receives them.

This block is the April block for the WERQ Bee. It's the first quilting bee, online or otherwise, that I've ever joined. It's made up of a great group of all male quilters! I was very excited when I stumbled across the parent group. Men Who Quilt on Facebook. It was a group created in tandem with the No Girls Allowed Quilting Bee which I first heard about on Molli Sparkles blog, you can read about it here.  I guess I will have to compose a list of those who are in the WERQ Bee and link to those who have blogs, instagrams, and flickr accounts. That will come soon.

Do you belong to any bees? Do they have photo sharing pages that we should know about?

Here goes anything! Linking up with Stitch by Stitch, Anything Goes Monday.

Wednesday, March 26, 2014

So, yeah. This happened today.

I felt like such a grown-up adult today. I was awake and ready to go by 8:00 this morning and it was my day off! I had a plan to check a few more items off my spring break to-do list and as I'm realizing there isn't enough time in the day to do all of things that I would like to do. 


The first stop was the farmer's market to get strawberries for the second annual spring break jam session. A tradition that started last year when my mom came to visit and one that I want to continue because of memories, love, and deliciousness. 


I thought there was something quietly beautiful about the berry tops in the sink. As I cut the berries this morning, I thought of my grandfather. 

One time while peeling and preparing apples for applesauce, grandpa picked up an apple, looking at it closely and said "Here it is, the one I've been looking for." As a small child, I was astonished, how could he know that apple was the one, and what was so special about it? 
"Why were you looking for that apple?" I asked. "It's the last one" he replied. 

The whole process would have been quite lonely if it hadn't been for my intrepid kitchen helper, Mr.Potato Head. He was in charge of making sure all of the jelly jars were in tip top condition.


The berries are beginning to boil. The first of two batches to be made. 

Mr. Potato Head holds his wand high, admiring the hard work.


After jammin' in the kitchen for a bit. I decided it was time to cut into my coveted quilt expo fabric. It seemed fitting with the strawberry day that I was having to work with stunning strawberry colors in fabric.
I hung them in a tree. Why? Why not?


I followed the method that I was practicing yesterday with some scrap stripes. The scrap stripes are a very even, reliable, predictable stripe. The new fabric has the look of a batik, and perhaps that was the way it was made. I was told that it was hand painted. There are certain irregularities in color from one selvage of the fabric to the other that create really nice variety in the little blocks. 


Barni approves of both projects for the day. He would also like to Live a Colorful Life and randomly join the Let's Bee Social party at Sew Fresh Quilts that I was invited to. I'm not sure that pets are allowed though, so he'll have to sit this one out.


Tuesday, March 25, 2014

Spring Break Projects

Another great day of worry free Spring Break is coming to close. While it may be 'worry free,' I still have a to-do list that feels like a mile long. All of the projects that I have been working on and posting about are fun, but I have listed them as goals to accomplish during this time away from school.

First up is a modified pineapple block for the WERQ Bee. The host for the month of April is Mr. Waldo Bluestone you can view his Instagram here.  He put together some really great directions for us to follow about how to make the blocks. Here is what I created with his directions. I think this block would be a cinch to cut for production piecing. I'll try to paraphrase for you. 

First I cut the fabrics: 2 squares are 3 1/2", and 1 each of 4", 5", 6" and 8". We are cutting ours so that the smallest square is the darkest and the largest square is the lightest with a gradient of colors between the two. *update This method works great, but may not be a precise as I would like. There may be some trimming and finesse needed*
 

On the back of all of the squares except the darkest color mark an 'X' with pencil. I used my ruler to draw the lines from one corner to the other being careful not to stretch the fabric as I drew the line across the grain of the fabric. 

Sew the two 3 1/2" squares, right sides together with a 1/4" seam around the entire square. This was the strangest thing to do. I couldn't imagine what I was going to do with two pieces that were completely stitched together! 


Here it is all sewn together. I found that I could stitch around the edge of the square and when my needle went into the pencil line, I could keep the needle in the down position and then just turn the square to keep the 1/4" seam.

Here is where it gets interesting. You pinch the fabric right on one of the pencil lines and make a small snip with scissors and then cut along the lines. Open and press the seams and you have a square within a square! I was so excited that this worked, and that it was so easy. 


I trimmed off the little triangle bits that hang off on each side and was ready to sew the next largest square on in the same manner. The picture on the right above shows the original square all trimmed and placing the next square on top. Just repeat these steps until all the squares have been used up. If you're like me, you'll be sad when you've gone through all of the squares. I really wanted to just keep adding to this block. As Mr. Bluestone mentioned there is one square that you cut the 'X' and press it and find that it is just a bit too big for the next solid square, I just trimmed that one down a little bit and was ready to go. This made a great 10" block.

I'm thinking this block would be easy to save scraps for, just save squares in all of the sizes that you'll need and stitch them together when ever you have a nice cache of them.

Another item that I've been working on is trying to decide what to do with this fantastic fabric I bought at the Quilt Expo in Lakeland. I originally thought I could use it in the graphic block that I made before, but I think there are just too many colors for this to be successful. 


I did some experimenting tonight to see how the stripes could be put together. I used scraps of other stripes because I'm afraid to cut into my other prized fabric. 


I made up some HST's (Half Square Triangles). I cut 5" squares and put two of them together. Then I drew a line down the middle with some tailors chalk. I sewed a 1/4" inch away from the line on both sides and cut on the line afterwards. Press the seams open and there are perfect mitered stripes. I think those bright colors will make a great variety of these blocks and I can play with an arrangement later. 


Now to just round out my evening and hop around the blog world a bit. Fortunately I found the Fabric Tuesday linky party at Quilt Story. That's where I'm going to start tonight! I will end at My Quilt Infatuation's Needle and Thread Thursday

Monday, March 24, 2014

Here Goes Anything

I feel so free to create right now! I'm officially on spring break from the art teaching gig and all of my classroom cares have washed away. Now, I can focus more time and attention on the good stuff; quilty fabric goodness!


My first project finish went into the hands of the post office today and will hopefully reach my dear friend and her little girl by mid week. I spent the evening last night creating a little label for it. I haven't done any embroidery since college when I recreated a portion of Bayeux Tapestry for my Medieval Art History class. So I think I've found another area that could use some skill building.

After an hour and half of pulling weeds in my front yard I rewarded myself by finishing up a couple of Springtime themed log cabin blocks for the WERQ quilting bee that I joined in February. So far in this "Consortium of Men Who Enjoy Rigorous Quilting," we've made a block that feels similar to a Sudoku block, and now the log cabin.

Sudoku-esque block; the first from the WERQ Bee. Each piece of the block was to have a different gray fabric and each participant was to incorporate the string pieced chevron in a different part that corresponded with the month that they host the bee. I know it sounds kind of complex, but the awesome February host put together some rockin' instructions that made it much less intimidating.
I liked the freedom to improvise that was allowed and encouraged by the March host of the WERQ Bee. I added the fun diagonal stripe to one of my logs because I thought it needed one.
In this Springtime inspired log cabin block I added a little tag. The thin pink stripe in the upper left quadrant sticks out kind of like the tag in a shirt. I like the idea, and I hope the host doesn't mind. I was just thinking, it might be problematic when it comes time to quilt the finished top.

Finally, I'm checking out some lovely new blogs thanks to the Anything Goes Monday linky party hosted by Marelize at Stitch by Stitch.

                                                 "When grandmama whose age is eighty 

In night clubs is getting matey with gigolo's, 
Anything Goes."
stitch by stitch

Saturday, March 22, 2014

Getting my Sew-Jo at the Quilting Ex-po

I am learning that I have a lot to learn about the world of quilting! Fortunately, there is such a wonderfully rich and diverse world out there of crafters, quilters and bloggers to share their inspirational photos, tips, tricks and tutorials. (Wow, if photos started with a 't,' I would have had some really awesome alliteration.) While I haven't exactly been the most productive today in making things, I have learned a ton.

Today, I attended the Original Sewing and Quilt Expo in Lakeland, FL. Wow! There were so many great things to see and people to watch. My partner, Seark, and I played with the long arm quilting machines and dreamed little dreams of a fun side business venture with one of them.

One of my favorite parts of the Expo was an exhibit in the Display Gallery called "Quilt As Desired." Long arm quilters from many different places quilted their own designs on vintage quilt tops. It was almost as if life was renewed in these fantastic quilts. 


I purchased some great fabric in a stripey pattern that I can't wait to play with. Perhaps in my next interpretation of the Graphic Black and White Quilt from my Quilty Bucket List.


Finally, I am excited to have found Kim at My Go-Go Life who is hosting this neat Sew-Jo (Sewing Mo-Jo) link party. Since we are to feature our creative endeavors from the week, I think I can continue to celebrate the finish of my first quilt in 2014. I am excited to be getting this quilt in the mail this week. I will have the time over spring break to create a tag and get it sent out!

I love the binding on this little quilt and can't wait to send it off to it's new(ly born) owner!

Wednesday, March 19, 2014

Quilty Bucket List

As I delve further into this Mad, Mad, Mad, Quilty World I've been thinking about what are the ultimate projects that I would like to create. What is my Quilty Bucket List. Then, last week I came across this very topic at The Tilted Quilt.

Curved Seams and Applique

Jeweled Wedding Ring
I have had a copy of a book by Kay Connors and Karen Earlywine called Link to the '30's: Making the Quilts We Didn't Inherit for several years now. The book resides on my bedside table and every other week or so I torment myself by looking at it and imaging the 638 appliqued circles need to bedazzle this beauty. I will make this pattern! I just have to work up the crazy to get it done.

Graphic Black and White

Aakash Nihalani on Tripoli Gallery 
I found this artist in an advertisement from West Elm. He was doing some great geometric tape art for some pop up stores for West Elm. Further research lead to this image and an immediate idea for a quilt. I've been playing with the idea a little and have a fun start, but I want to manipulate pattern further and create my own striped fabric. I would love to have stripes that change from wide to narrow to create a starker illusion of depth. You can see more about my initial trials with this here

Orange Groves Quilt

I would love to make a quilt that represents the blog and the orange groves that surround my neighborhood and the school where I teach. I will post a picture of my inspiration once I have permission from the blogger to reuse her image.

Multi Block Quilt

I love this quilt by Jen Kingwell.

I've read about a ton of people working on this quilt called Green Tea and Sweet Beans which has such a great variety of blocks and quilting techniques. I would love to make one of these types of quilts, either from a pattern, or of my own design. Perhaps I will even include my Under-Ruse block.


I cannot wait to check some of these ideas off my list, but I know that for every idea checked off there will be 7 more. What is on your Quilty Bucket List?
The Tilted Quilt

First Finish of 2014

Yesterday I had a mini celebration for myself as I completed my first quilt for 2014. The quilt is a small lap or crib sized quilt made of fun 1930's reproduction fabrics and some of Carolyn Friedlander's Architextures. After reading so much about improvisational piecing all over the quilternet (Mainly the Quilt Improv blog hop for Lucie Summers book) I decided to give it a try for this project. 

So here's the thing, I love to read and learn tons, but I am horrible with keeping track of where all of the information came from. The blogger of one of my favorite posts talked about how they liked to riff on the improv notion by setting up a couple of rules for improv blocks and then loosely sticking with them. The rules for my blocks were:
1. Each block would be made of random width strips of fabric.
2. One of the strips of the blocks will be made of two pieced fabrics.
3. The blocks would be sashed.

I followed these rules loosely and as I hope you can see from the photo above that some of the blocks do not have rule #2, but that is fine. It's fun to break the rules sometimes.

The quilt came together quickly. The blocks took one evening, and putting the quilt top together took one more evening. I used IKEA fabric for the backing and sashing. The green backing is an IKEA sheet. I've read about other bloggers using some of these great prints and the sheets in their quilts. I'm a thrifty guy, so the $5.00 green twin sheet was a great buy to help cover the back.


Here is the completed quilt with the green IKEA twin sheet and a fun animal print from IKEA pieced to make the back.

Here is the front of the the quilt completely hand quilting with straight lines and a chevron, the point of it follows the seam between the green sheet and animal print of the back.

I also used the IKEA animal print for the binding. I haven't done the binding on a quilt since 2007 and I needed a little refresher. Jenny at Missouri Quilt Company refreshed my memory in this great video tutorial. I love the way the large print and color of the binding almost looks like a pieced binding. 


Now, if you've read this far I have to tell you my favorite discovery from working on this project. This is not only my first quilt finish of 2014, but it's also my first gift quilt. I made this for the new born of my best friend from college, Anna. Making a gift quilt was a great experience. I thought about my friendAnna during every step of this quilt. I reminisced about all of the great times we shared. I thought about what a great mother she is going to be to her daughter and how lucky this little girl is to have such an awesome momma.

I am already thinking about my next gift quilts and the great memories that I can think about as I create. Who will you share your gift with next?

Jan-Michael

Sunday, March 2, 2014

Under-Ruse


There comes a moment when you must take all of the inspiration that has been accumulating inside and putting it into something of your own. I have been learning and playing and having fun recently with all sorts of quilty ideas. I love inputting information and thinking about, but I've reached a breaking point and had to create something. Mostly I've recently been inspired by Carolyn Friedlander and her beautiful fabrics and paper pieced quilt patterns. I wanted to create my own paper pieced pattern so I could learn how it all works. I remember an art professor in college telling us that when we are lost on visual ideas we should draw the clothes on our bedroom floor. 

So I started with a couple of drawings. I scanned the top drawing to my computer and used Photoshop to clean up the drawing and alter some of the measurements. After a weekend of tweaking, testing, redrawing, enlarging, and tweaking some more I think I have finally made a pattern that works well.


I'm calling the pattern "Under-Ruse." It creates a block that is 9 1/2" square, or 9" with a 1/4" seam allowance all around. It includes four separate pieces on two pages that combine together to create the block pictured above.

 The file is in two parts. Follow the links to find both pages. Page 1 and Page 2.

I am happy to share this pattern with you. Please let me know if you find any mistakes or have suggestions. I look forward to seeing your creations! 

I'm linking up with the Paper Piecing Link Up at Quilt Art Designs